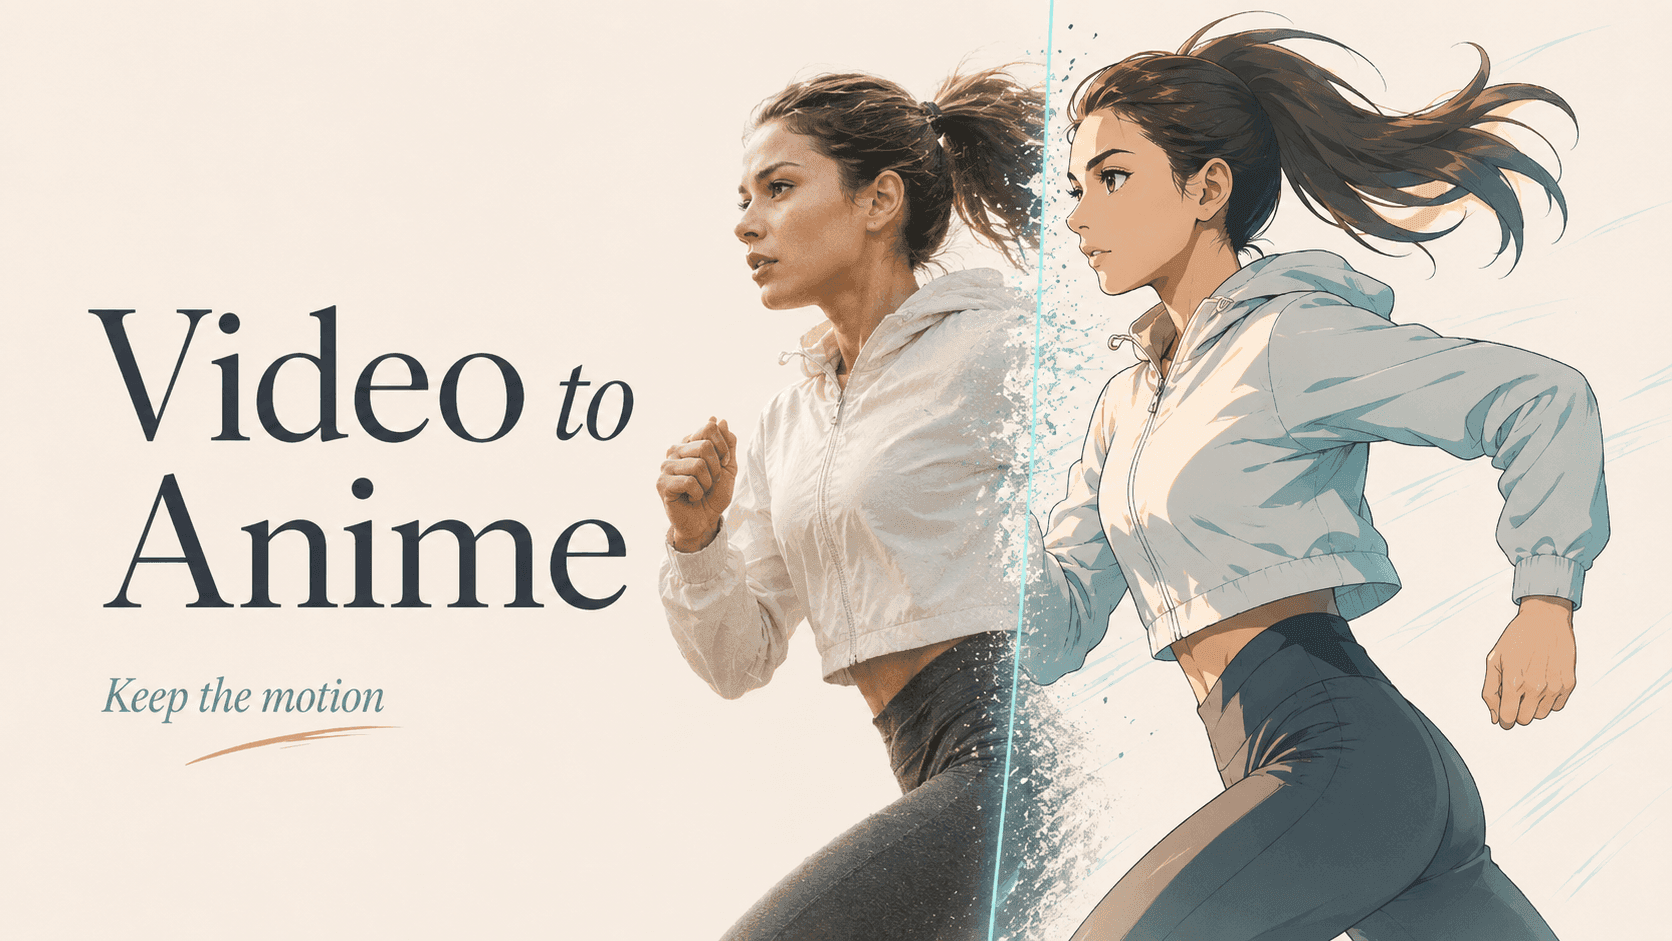
Um ein echtes Video in Anime umzuwandeln, behältst du die aufgenommene Darbietung bei und änderst mit Video zu Video die visuelle Gestaltung. Beginne mit einem klaren Clip, wähle einen Anime-Stil und entscheide, ob nur das Motiv oder das gesamte Bild neu gestaltet werden soll. Entscheidend ist, die vorhandene Bewegung zu bewahren, statt eine neue Darbietung per Prompt anzufordern.
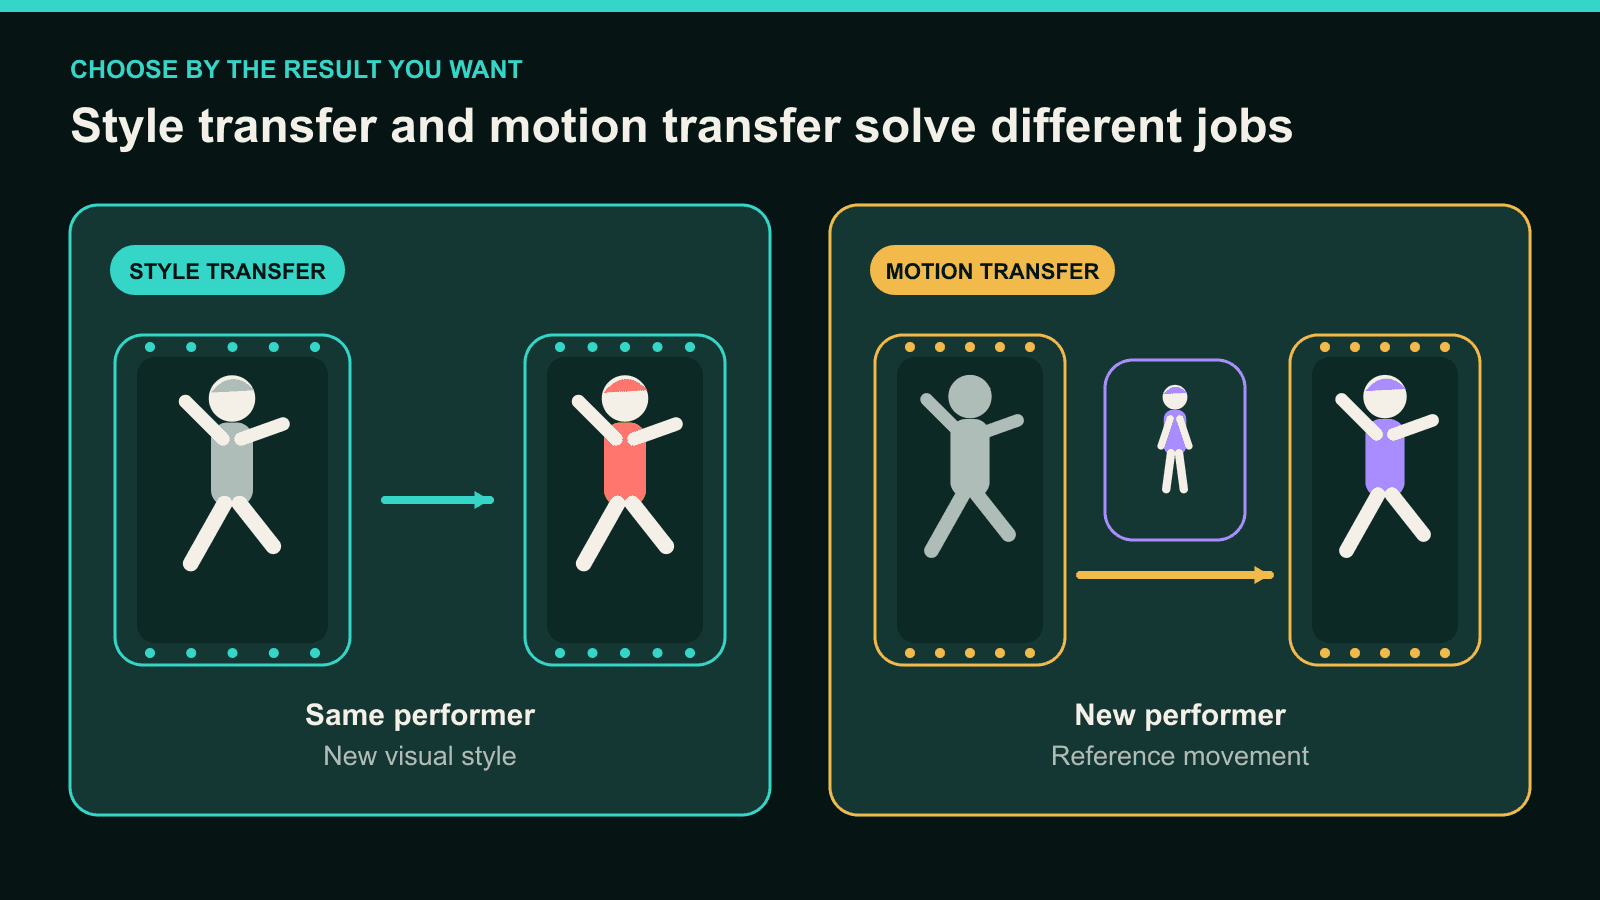
Dieser Unterschied ist wichtig. Bei diesem Workflow geht es um Stilübertragung. Person, Timing und Kamerakomposition stammen aus deinem Material. Du änderst das Aussehen des Clips und lässt nicht eine andere Figur dessen Bewegung kopieren.
Was Video zu Video tatsächlich verändert
Video zu Video erstellt eine stilisierte Version eines vorhandenen Clips. Die aufgenommene Bewegung dient als Grundlage, während die visuelle Welt Bild für Bild neu gezeichnet wird.
Betrachte das Ausgangsvideo als Choreografie und Schnitt. Der gewählte Stil bestimmt Linienführung, Schattierung, Farbpalette, Textur und Detailgrad.
Das ist mehr als ein Farbfilter. Ein Filter liegt meist nur über den Originalpixeln. Ein generatives Restyling kann Gesichter, Kleidung, Requisiten und Hintergrundformen neu interpretieren.
Die Hauptaktion sollte erkennbar bleiben, kleine Details können sich jedoch ändern. Prüfe immer das bewegte Ergebnis und nicht nur ein attraktives Einzelbild.
Wenn du eine Figur ersetzen möchtest, brauchst du einen anderen Workflow. Charakter zu Video verwendet ein Charakterbild als neue auftretende Figur und ein Video als Bewegungsreferenz.
Die Entscheidung ist einfach:
| Dein Ziel | Verwende | Was im Mittelpunkt bleibt |
|---|---|---|
| Die auftretende Person beibehalten und den Clip in Anime umwandeln | Video zu Video | Person, Aktion, Timing und Komposition des Ausgangsmaterials |
| Eine eigene Figur die Bewegung ausführen lassen | Charakter zu Video | Referenzbewegung und Design der neuen Figur |
Material für Anime-Restyling vorbereiten
Beginne mit Material, bei dem die Hauptaktion auch ohne Pause verständlich ist. Video zu Video akzeptiert MP4-, MOV- und AVI-Dateien mit einer Länge von bis zu 10 Sekunden.
Ein guter erster Clip zeigt ein klar sichtbares Motiv, eine deutliche Beleuchtung und eine stabile Kamera. Eine Nahaufnahme einer sprechenden Person, ein kurzer Gang oder eine Tanzphrase bietet genug Bewegung, um das Restyling zu beurteilen.
Schnelle Schwenks und starke Bewegungsunschärfe liefern dem Generator weniger klare Bildinformationen. Das gilt auch, wenn Hände den Bildausschnitt verlassen oder eine weitere Person das Motiv kreuzt.
Schneide den Clip an einer natürlichen Aktionsgrenze. Presse eine längere Sequenz nicht durch eine Geschwindigkeitsänderung in zehn Sekunden. Dadurch würdest du genau die Darbietung verändern, die erhalten bleiben soll.
Wähle vor dem Hochladen drei Bewegungsmarken. Bei einer Gehaufnahme könnten das der erste Schritt, die Drehung und der abschließende Blick zur Kamera sein.
Nutze diese Marken beim Vergleich von Quelle und Anime-Version. Bleiben dieselben Momente erkennbar, hat das visuelle Restyling den wichtigsten Teil bewahrt.
Integrierte Anime-Stile oder Fusion: Welcher Weg passt?
Verwende einen integrierten Stil, wenn einer der verfügbaren Looks bereits zu deinem Projekt passt. DomoAI bietet mehr als 40 Stile für Video zu Video, darunter über 20 Anime-Stile.
Achte nicht nur auf die Farbpalette des Vorschaubilds. Vergleiche Linienstärke, Schattenformen, Gesichtsdetails und Hintergrundgestaltung. Ein detailreicher Porträtstil kann für eine Nahaufnahme passen, bei schneller Ganzkörperbewegung aber unruhig wirken.
Auch die Modellwahl richtet sich nach dem Bildausschnitt. V6.0 ist für Halbfiguren und Nahporträts optimiert. Für Ganzkörperaufnahmen ist es nicht geeignet.
Verwende Fusion, wenn du eine individuelle visuelle Richtung brauchst. Fusion akzeptiert einen Text-Prompt oder ein Referenzbild.
Beschreibe eine zusammenhängende Gestaltung, statt ein Studio, Franchise oder einen lebenden Kunstschaffenden zu nennen. Konzentriere den Prompt auf die visuelle Welt. Die aufgezeichnete Aktion stammt bereits aus dem Clip.
Fusion-Richtung für ein Straßenporträt
Füge diesen Text in Fusion ein und ersetze anschließend die Angaben zu Kleidung und Umgebung durch deine eigenen:
Handgemalte, von den 1990er-Jahren inspirierte Anime-Gestaltung mit sauberen
schwarzen Tuschekonturen und zweistufigem Cel-Shading. Die marineblaue Jacke des
Motivs mit weißer Einfassung beibehalten. Eine warme Spätnachmittagspalette,
natürliche Gesichtsproportionen und einen vereinfachten gemalten Stadthintergrund
verwenden. Linienstärke, Jackenfarben und Schattierung im gesamten Clip konstant
halten. Kein neuer Text, keine Logos und kein Wasserzeichen.
Der Prompt hat eine Aufgabe: den Look zu definieren. Er fordert die Person nicht zu einer neuen Bewegung auf.
Speichere bei einem Schnitt aus mehreren Clips die genaue Stilwahl, die Fusion-Referenz und den Prompt. Verwende sie erneut, statt denselben Look aus dem Gedächtnis zu beschreiben.
Nur Motiv oder Restyling des gesamten Bilds?
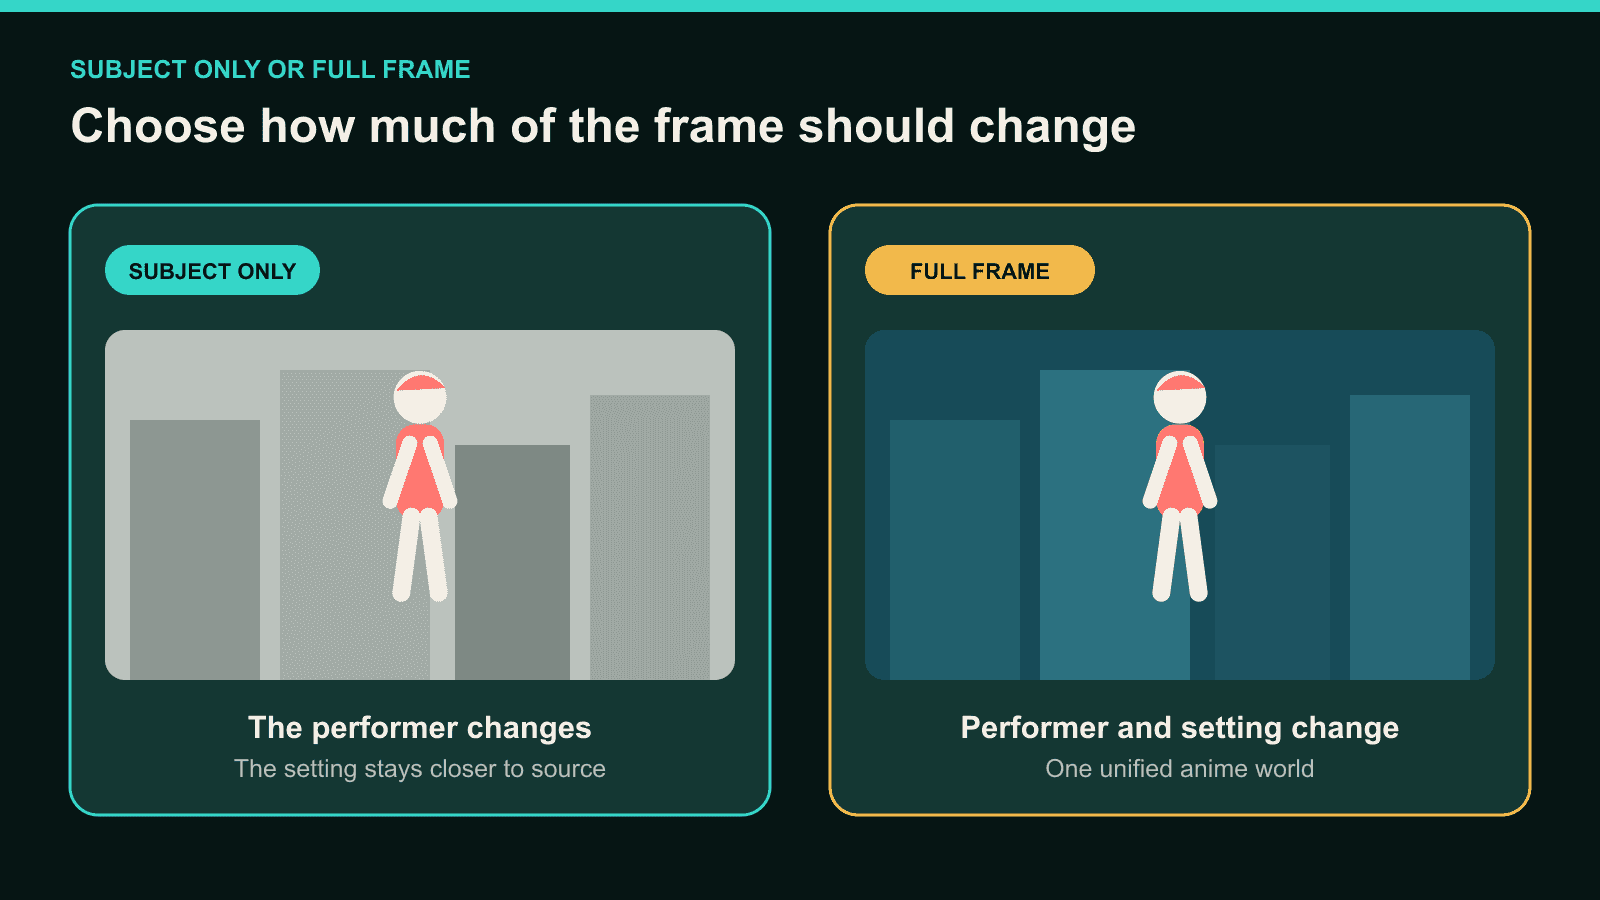
Wähle Subject Only, wenn die Person den Anime-Look erhalten soll, der Ort aber näher am Original bleiben muss. Gestalte das gesamte Bild neu, wenn auch die Umgebung zur Anime-Welt gehören soll.
| Aufnahmesituation | Bessere Ausgangswahl | Was zu prüfen ist |
|---|---|---|
| Creator spricht in einem gebrandeten Raum | Subject Only | Haarkanten, Ärmel, nahe Requisiten, Hintergrundtext |
| Cosplay-Clip in einem schlichten Studio | Subject Only | Kontur um Kostüm und bewegte Gliedmaßen |
| Reiseszene, in der die Straße wichtig ist | Restyling des gesamten Bilds | Gebäude, Schilder, Horizontlinien und bewegte Personen |
| Narrative Aufnahme in einer einheitlich gestalteten Welt | Restyling des gesamten Bilds | Ob Vorder- und Hintergrund dieselbe visuelle Gestaltung teilen |
Subject Only friert den Hintergrund nicht Pixel für Pixel ein. Bewegte Kanten, Schatten und nahe Objekte können sich weiterhin verändern.
Prüfe jede Überlappung. Haare vor einer Wand, eine Hand über einem Tisch oder ein Ärmel vor einer Requisite können die Motivgrenze weniger eindeutig machen.
Das Restyling des gesamten Bilds schafft eine einheitlichere Welt, gibt dem Modell aber auch mehr Details zur Neuinterpretation. Verwende es, wenn die Umgebung zum Ergebnis beiträgt.
Bewegung und Stil konsistent halten
Prüfe den Clip zuerst in Bewegung, bevor du Einzelbilder untersuchst. Frage zunächst, ob die Hauptdarbietung noch wie die Quelle wirkt.
Vergleiche die zuvor markierten Bewegungsmomente. Prüfe Richtung, Timing, Körperposition sowie den Kontakt mit Boden oder Requisiten.
Prüfe danach die Stilkonsistenz. Verfolge dieselbe Jacke, Gesichtskontur und dasselbe Hintergrundelement vom Anfang bis zum Ende.
Ändere nicht gleichzeitig Quelle, Stil, Modell und Subject-Only-Einstellung. Benenne das sichtbare Problem und ändere dann die damit am engsten verknüpfte Eingabe.
Wechsle beispielsweise von V6.0 weg, wenn bei einer Ganzkörperaktion Beine und Füße klar bleiben müssen. Verwende einen deutlicheren Quellabschnitt, wenn Bewegungsunschärfe bei einer Drehung das Gesicht verdeckt.
Funktioniert die Bewegung, aber die visuelle Gestaltung schwankt, behalte die Quelle bei und verfeinere die Stilrichtung. Wiederhole die prägenden Angaben zu Palette, Linienführung und Kleidungsfarben.
Dieses Vorgehen beseitigt normale Generationsabweichungen nicht. Es erleichtert aber die Diagnose jedes neuen Versuchs.
Ein längeres Video zu einem Anime-Schnitt verarbeiten
Teile Material mit mehr als 10 Sekunden vor dem Restyling in kurze Aufnahmen. Schneide bei abgeschlossenen Gesten, Kamerawechseln, Pausen oder natürlichen Takten.
Führe für den gesamten Schnitt eine kurze Kontinuitätsnotiz:
- Integrierter Stil oder Fusion-Referenz.
- Genauer Fusion-Prompt.
- Modellwahl für jede Art von Bildausschnitt.
- Subject Only oder gesamtes Bild.
- Quellzuschnitt und Ausgabeformat.
Verwende in zusammengehörigen Clips dasselbe visuelle Vokabular. Wenn ein Abschnitt V6.0 für eine Nahaufnahme braucht, gehe nicht davon aus, dass es auch zur folgenden Ganzkörperaufnahme passt.
Setze die ausgewählten Clips in CapCut, Premiere Pro, DaVinci Resolve oder einem anderen Editor zusammen. Füge dort den Originalton oder den finalen Soundtrack wieder hinzu.
Sieh dir die montierte Sequenz ohne Pause an. Ein Wechsel bei Kleidung oder Palette, der einzeln klein wirkte, kann an einem Schnitt deutlich auffallen.
Überarbeite nur den abweichenden Abschnitt, statt jede Aufnahme neu zu erstellen. Wenn das visuelle Ergebnis stimmt, kannst du den finalen Anime-Clip für die Ausgabe hochskalieren.
Häufige Probleme beim Anime-Restyling
Nutze diese Tabelle, um den ersten Prüfpunkt zu bestimmen. Betrachte jede Zeile als Diagnoseweg und nicht als versprochene Lösung.
| Was du siehst | Zuerst prüfen | Sinnvoller nächster Schritt |
|---|---|---|
| Das Gesicht verändert sich bei einer Drehung | Unschärfe und Gesichtsgröße in der Quelle | Auf einen klareren Moment kürzen oder enger zuschneiden |
| Hände werden unleserlich | Sichtbarkeit der Hände und Objektkontakt | Eine klarere Aufnahme wählen oder die verdeckte Geste herausschneiden |
| Kleidungsfarben wechseln | Stilrichtung und Kleidungsdetails | Schlüsselfarben wiederholen und die Gestaltung vereinfachen |
| Der Hintergrund flackert nahe am Motiv | Motivgrenze und Szenenkomplexität | Subject Only testen oder die überlappende Bewegung kürzen |
| Bei Ganzkörperaktionen verschwinden die Beine | Bildausschnitt und Modellwahl | Für die Ganzkörperaufnahme ein anderes Modell als V6.0 verwenden |
| Ein Abschnitt passt nicht zum Rest | Gespeicherter Stil und Fusion-Einstellungen | Die festgelegte Referenz und den genauen Prompt übernehmen |
Verwende Hochskalierung nicht als strukturelle Reparatur. Sie kann Auflösung und sichtbare Details verbessern, aber keine fehlende Geste wiederherstellen oder veränderte Bewegung korrigieren.
Wenn du mit einer unbewegten Zeichnung beginnst, animiere stattdessen ein Manga-Panel. Du kannst auch Workflows für Anime-Creator erkunden, wenn dein Projekt eigene Figuren und Szenen benötigt.
Fragen zur Umwandlung von Video in Anime
Behält Video zu Video die ursprüngliche Bewegung bei?
Video zu Video verwendet die Ausgangsdarbietung als Bewegungsführung. Die grobe Aktion sollte erkennbar bleiben, während sich kleinere Gesten und visuelle Details dennoch verändern können.
Ist Video zu Video dasselbe wie ein Anime-Filter?
Nein. Ein Filter ändert meist Farbe oder Textur über vorhandenen Pixeln. Video zu Video erzeugt eine neue stilisierte Version, weshalb sich auch Formen und Details ändern können.
Kann ich den ursprünglichen Hintergrund beibehalten?
Subject Only konzentriert die Stiländerung auf das Hauptmotiv. Ein pixelidentischer Hintergrund ist nicht garantiert, daher solltest du Kanten und nahe Objekte prüfen.
Kann ich statt der auftretenden Person meine eigene Anime-Figur verwenden?
Ja, verwende für dieses Ziel aber Charakter zu Video. Es verbindet dein Charakterbild mit der Bewegung eines autorisierten Referenzvideos.
Wie wandle ich ein Video mit mehr als 10 Sekunden um?
Teile es an natürlichen Schnittpunkten in Clips von höchstens 10 Sekunden. Verwende dieselbe visuelle Richtung und setze die ausgewählten Ergebnisse anschließend extern zusammen.
Die Anime-Umwandlung funktioniert am besten, wenn du sie als Restyling-Aufgabe behandelst. Halte die Ausgangsdarbietung klar, wähle ein visuelles System und ändere nur den Teil, der nicht funktioniert.
Öffne Video zu Video und gestalte einen kurzen Clip neu, an dem du die Rechte besitzt.